---
url: https://sugarat.top/technology/learn/tx-serverless-static.md
---
# 腾讯云Serverless实践-静态网站托管
:::tip
本文旨在帮助不懂运维/网络/服务器知识的**小白**,在**不租用云服务器**实现Web站点的上线部署
:::
超多图预警!!!
包含使用Github Action实现持续集成的步骤,绑定自定义域名等等
该手把手Serverless实践系列预计会出几篇包含静态站点,云函数,后端服务等等
如有表述不清,内容错误等还请评论区斧正
## 准备工作
* [注册腾讯云账号](https://cloud.tencent.com/register)
## 创建云开发环境
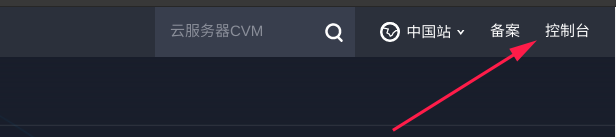
进入[控制台面板](https://console.cloud.tencent.com/),通常在首页右上角
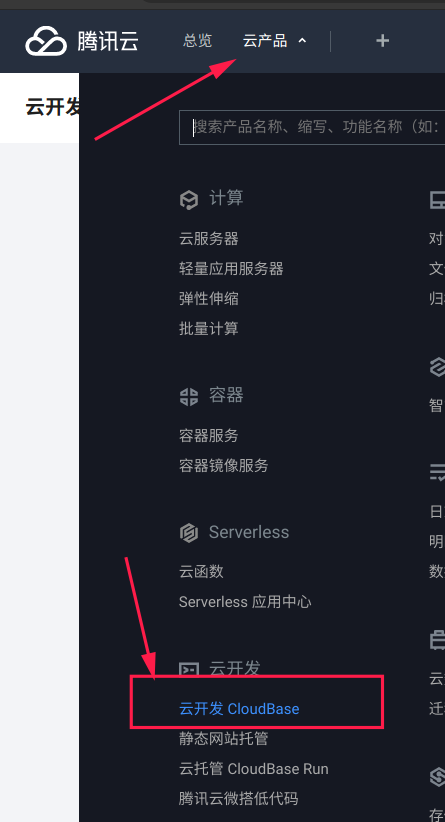
然后在左上角的云产品列表中找到[云开发CloudBase](https://console.cloud.tencent.com/tcb/env/index?rid=4)
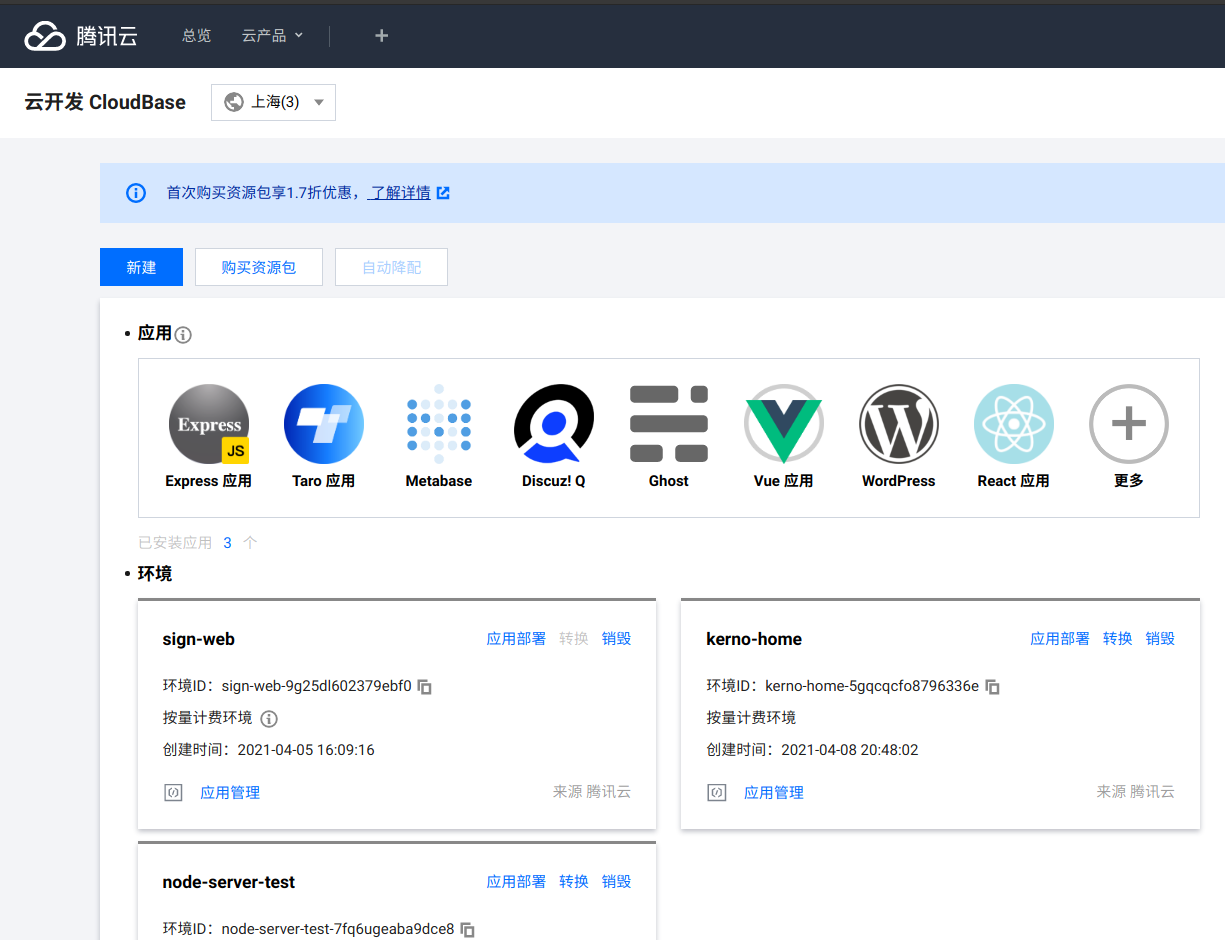
然后你能看到如下的界面
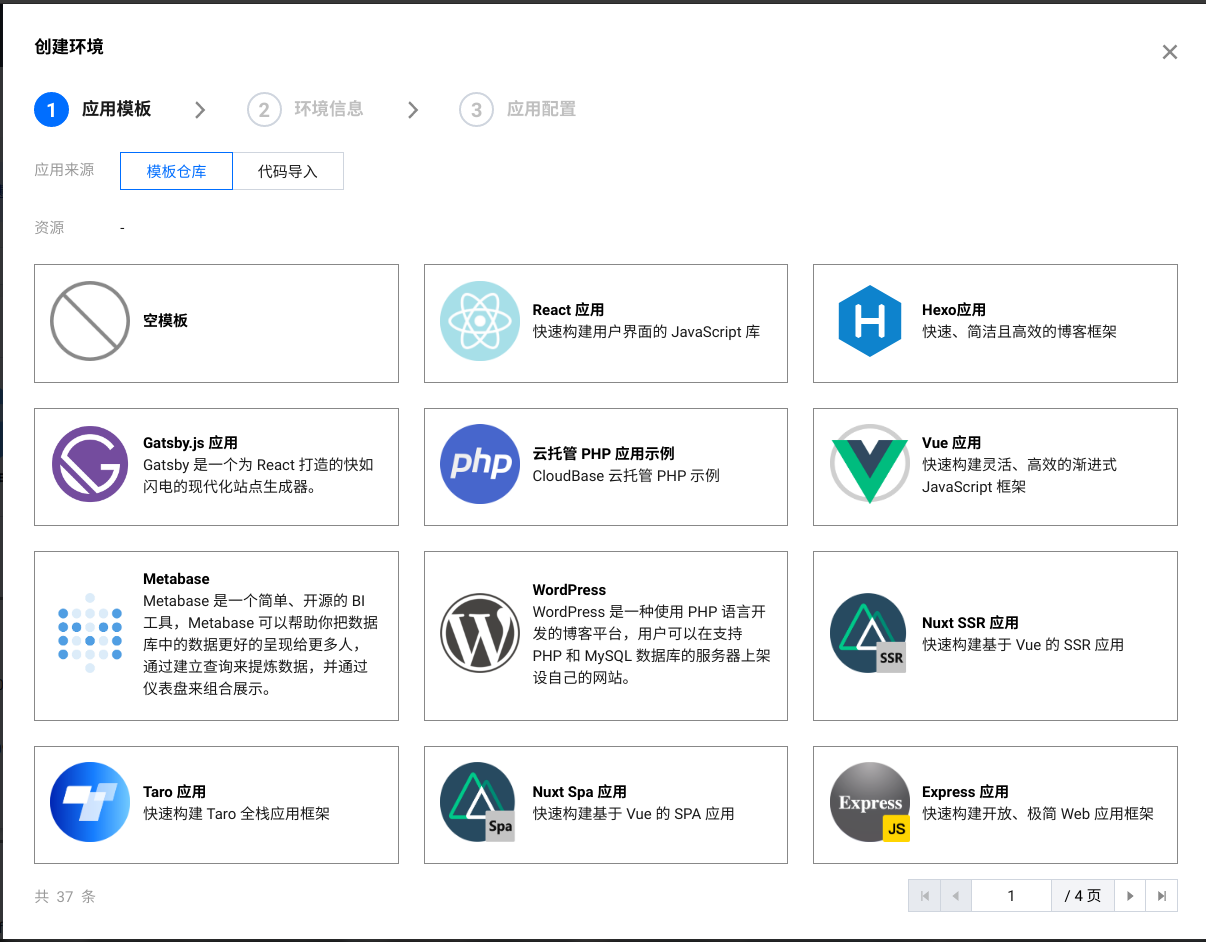
点击新建,可以看见有很多模板可供选择,咱们这里选择Vue应用,当然你也可以选择其它模板,我们主要是获得其生成的一个`cloudbaserc.json`文件,后文会详细介绍这个配置文件
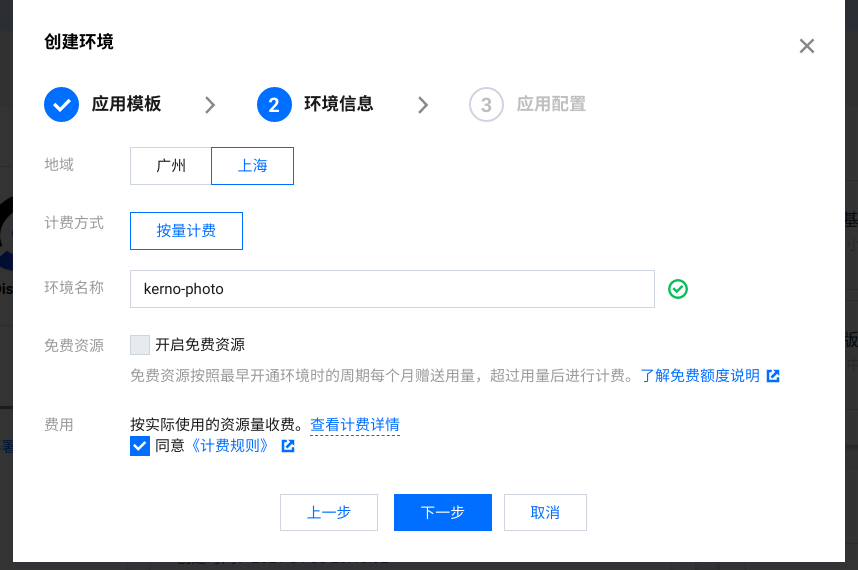
填写环境名称,选择按量计费(非常非常便宜),勾上**同意**,能勾上免费就勾上**免费资源**
填写完成后点击下一步
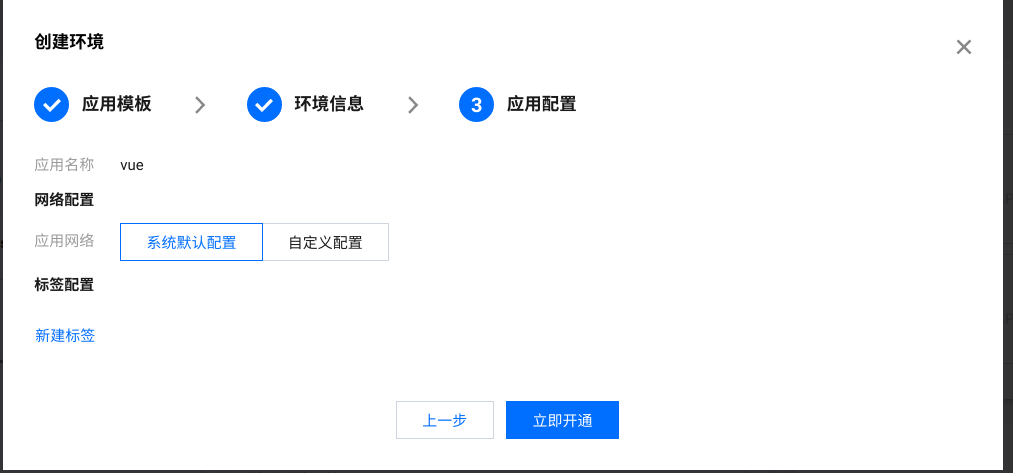
点击立即开通
接下来你能在当前页面看到刚刚创建的应用,记住这个环境id 后面会用上
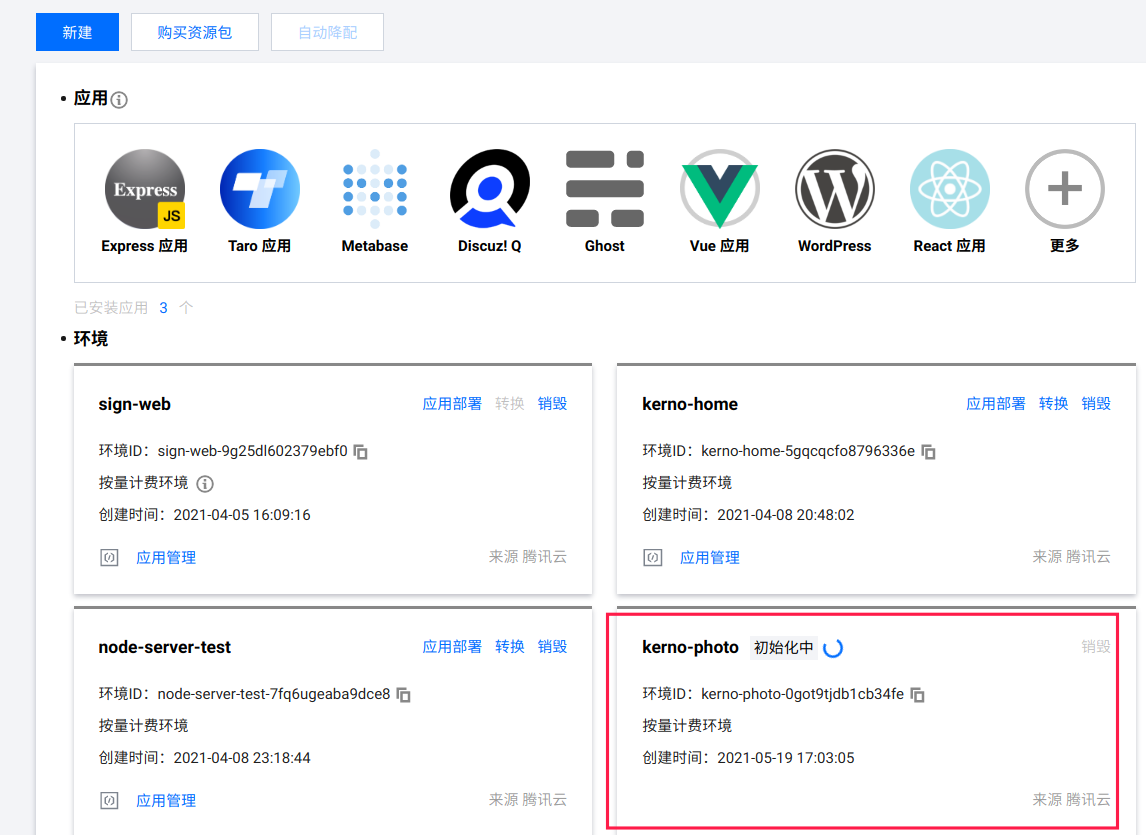
赖心等待几分钟就创建完成了
## 线上访问地址
点击创建完成的卡片
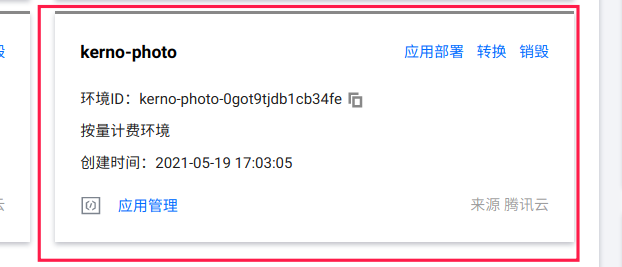
选择左侧菜单中的静态网站托管
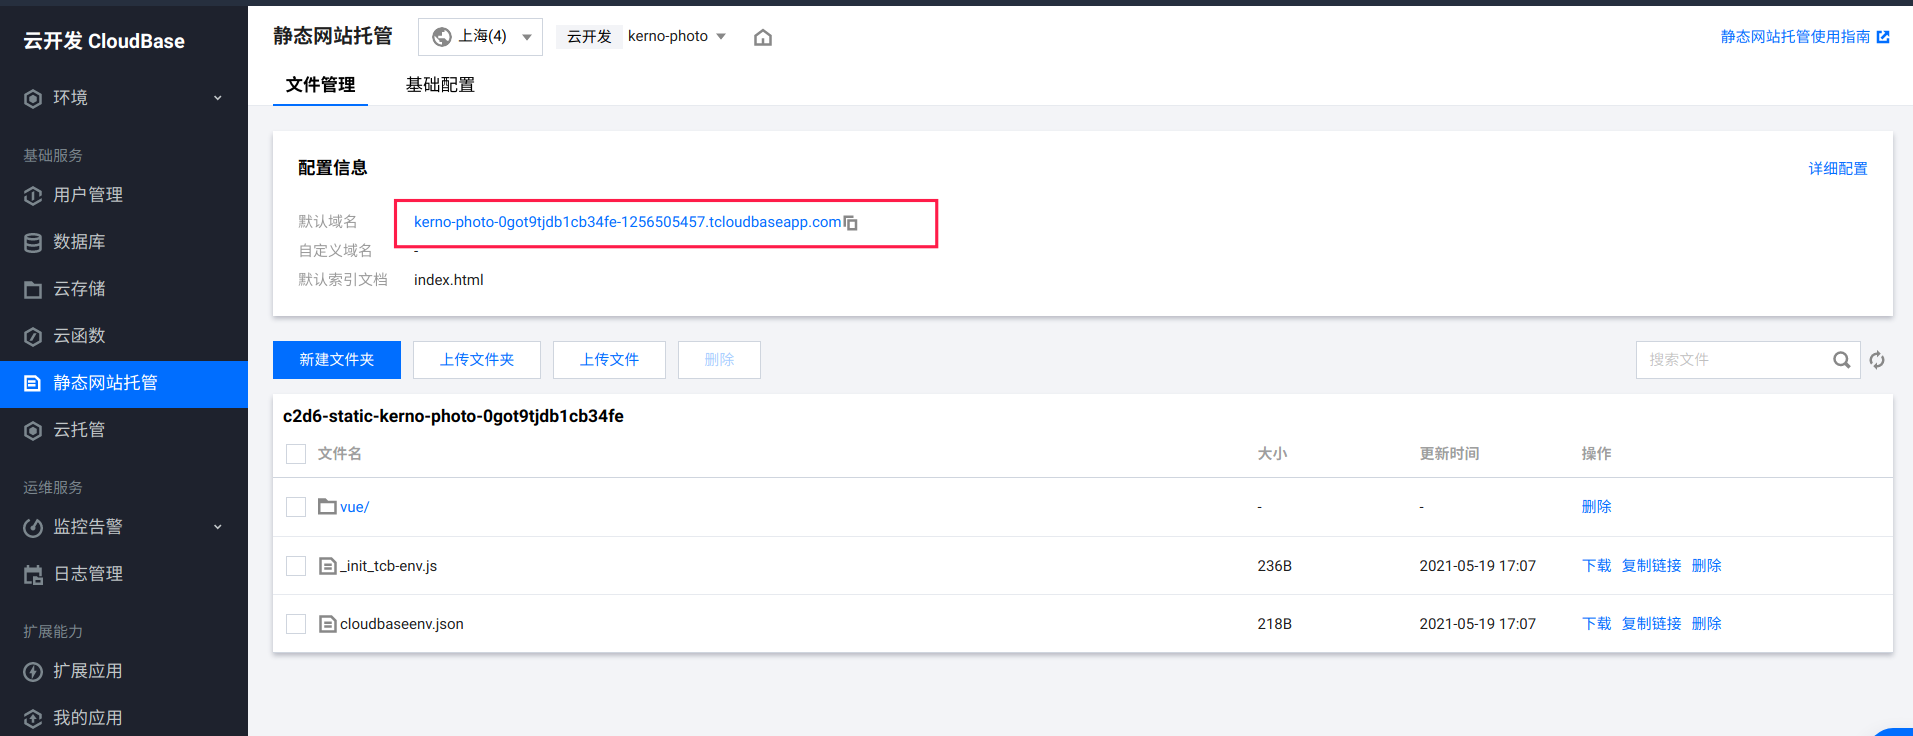
这里能看到模板项目部署在线上的**生产环境代码**与提供的**线上域名**
例如图中的:
## 模板的源代码
所有的模板源代码均在[Github:CloudBase Templates](https://github.com/TencentCloudBase/cloudbase-templates)
咱们上面的Vue项目模板源码在[此处](https://github.com/TencentCloudBase/cloudbase-templates/tree/master/vue)
在项目源码中我们就可以看到[cloudbaserc.json](https://github.com/TencentCloudBase/cloudbase-templates/blob/master/vue/cloudbaserc.json)文件
## cloudbaserc.json配置文件示例
配置文件需要自己修改的字段如下:
* envId:环境id,上文有说到获取的位置
* region:环境所在地区,上海(ap-shanghai),广州(ap-guangzhou)
* framework
* name:应用名称
* plugins/client/inputs
* installCommand:安装依赖的指令
* buildCommand:构建项目指令
* outputPath:用于部署的本地静态文件目录
* cloudPath:线上访问的基础路径
在咱们项目的根目录下创建这个`cloudbaserc.json`文件
### 最简单项目
目录如下
```sh
.
├── cloudbaserc.json
└── index.html
```
这里用到的最简单的`cloudbaserc.json`如下
```json
{
"version": "2.0",
"envId": "kerno-photo-0got9tjdb1cb34fe",
"region": "ap-shanghai",
"$schema": "https://framework-1258016615.tcloudbaseapp.com/schema/latest.json",
"functionRoot": "cloudfunctions",
"framework": {
"name": "kerno-photo-web",
"plugins": {
"client": {
"use": "@cloudbase/framework-plugin-website",
"inputs": {
"outputPath": "/",
"cloudPath": "/"
}
},
"auth": {
"use": "@cloudbase/framework-plugin-auth",
"inputs": {
"configs": [
{
"platform": "NONLOGIN",
"status": "ENABLE"
}
]
}
}
}
}
}
```
### 运用了构建工具的项目
推荐的`cloudbaserc.json`内容如下
```json
{
"version": "2.0",
"envId": "kerno-photo-0got9tjdb1cb34fe",// 环境id
"region": "ap-shanghai", // 环境所在地区
"$schema": "https://framework-1258016615.tcloudbaseapp.com/schema/latest.json",
"functionRoot": "cloudfunctions",
"framework": {
"name": "kerno-photo-web",// 应用名称
"plugins": {
"client": {
"use": "@cloudbase/framework-plugin-website",
"inputs": {
"installCommand": "yarn install --prefer-offline --no-audit --progress=false", // 安装依赖的指令
"buildCommand": "npm run build", // 构建项目指令
"outputPath": "dist", // 用于部署的静态文件目录
"cloudPath": "/", // 线上的基础路径
"envVariables": {
"VUE_APP_ENV_ID": "{{env.ENV_ID}}"
}
}
},
"auth": {
"use": "@cloudbase/framework-plugin-auth",
"inputs": {
"configs": [
{
"platform": "NONLOGIN",
"status": "ENABLE"
}
]
}
}
}
}
}
```
## 部署上线
### 前置环境
* Node.js
确保电脑上有Node.js环境,没有可参考[菜鸟教程:Node.js](https://www.runoob.com/nodejs/nodejs-install-setup.html) 安装
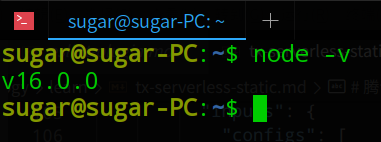
打开你的终端工具查看是否拥有Node环境
```sh
node -v
```
### @cloudbase/cli
安装[@cloudbase/cli](https://www.npmjs.com/package/@cloudbase/cli)工具
```sh
npm install -g @cloudbase/cli
```
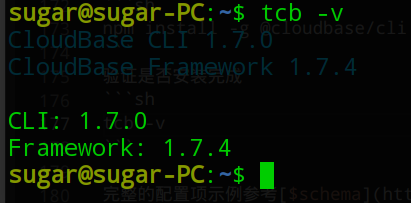
验证是否安装完成
```sh
tcb -v
```
完整的配置项示例参考[$schema](https://framework-1258016615.tcloudbaseapp.com/schema/latest.json)
### 部署
例项目目录:
```sh
.
├── cloudbaserc.json
└── index.html
```
在项目跟路径依次执行如下指令:
**登录**
```sh
tcb login
```
**部署**
```sh
tcb framework deploy
```
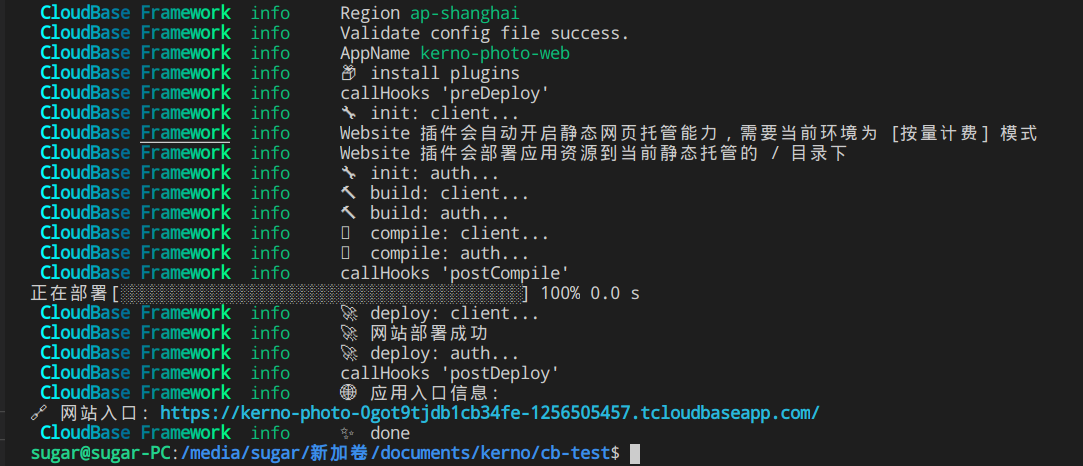
此时静静等待几秒,出现此图说明部署成功
示例访问地址:
可以看到我们的Hello World已经上去了
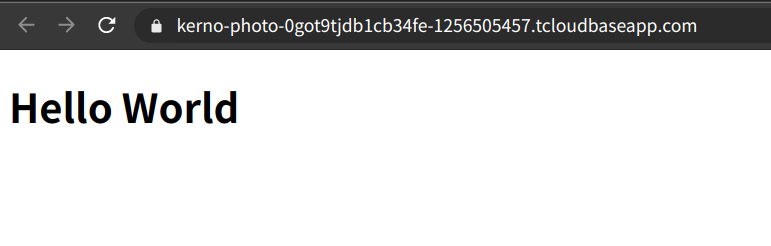
到此从0-1的创建应用到部署上线的流程都走完了
后续将会补充一些额外的内容,需要有一些相关知识的基础
## 绑定自定义域名
### 申请SSL证书
首先为域名[申请SSL证书](https://console.cloud.tencent.com/ssl)
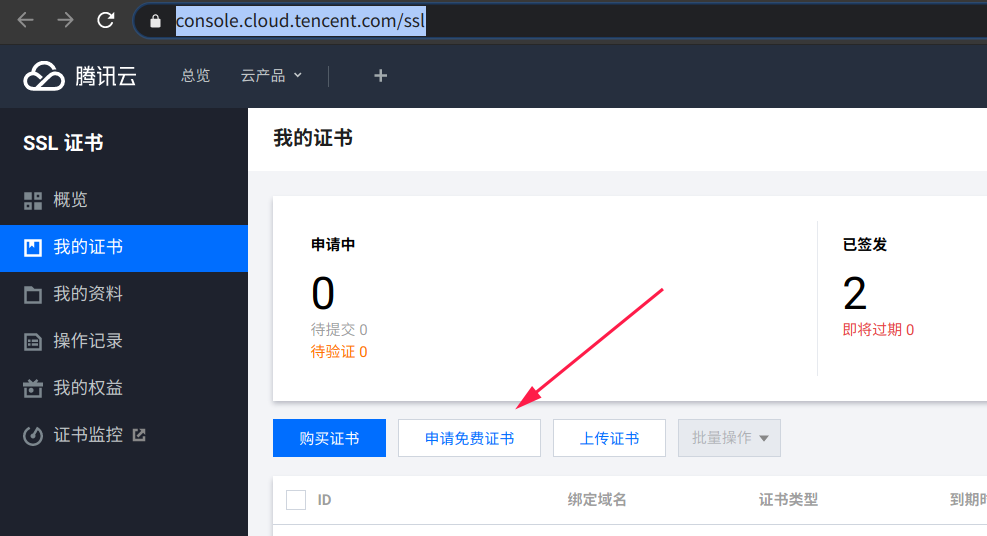
选择免费的
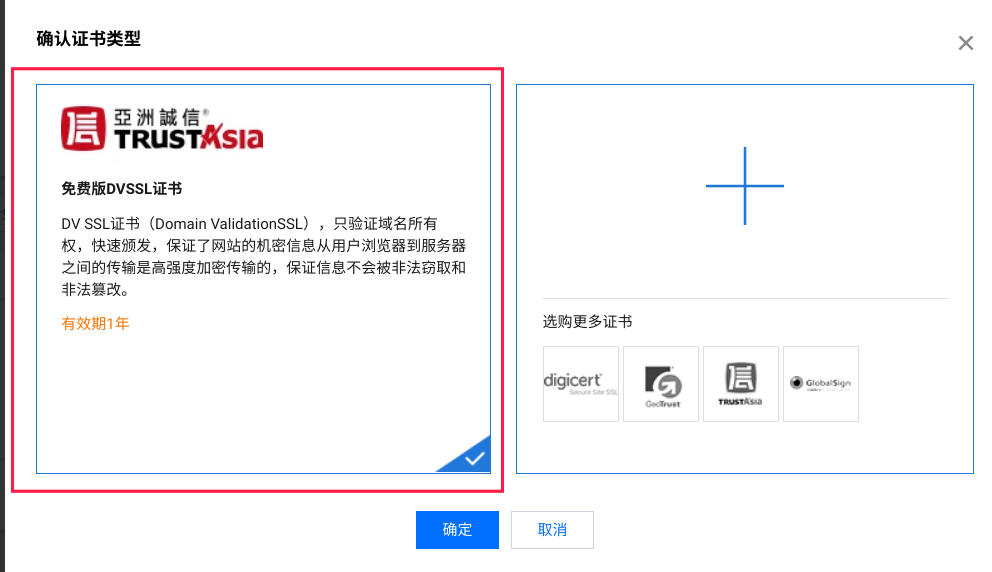
然后下一步填写必要的信息
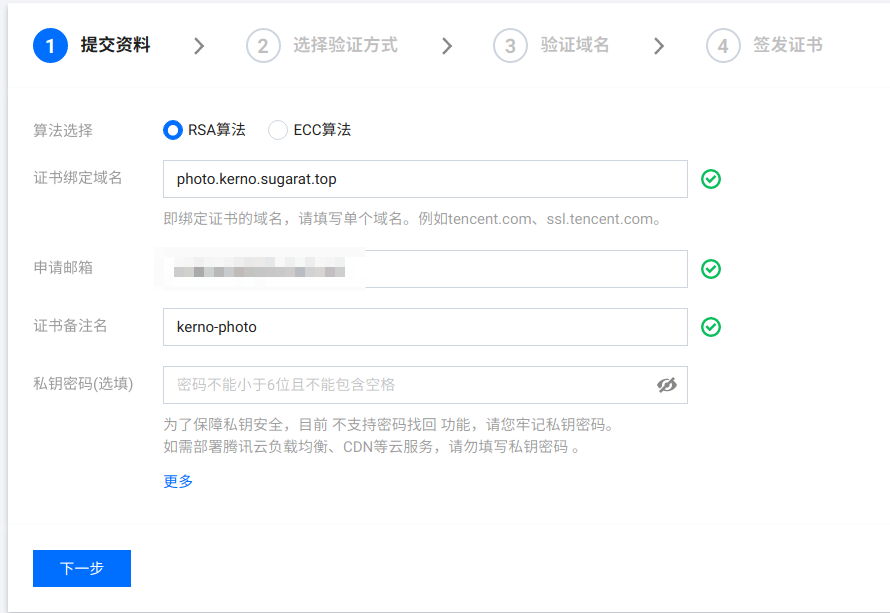
选择DNS验证
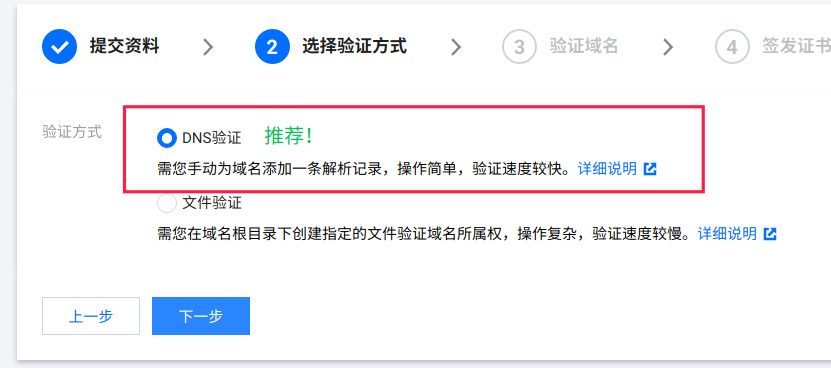
按要求添加一条解析规则
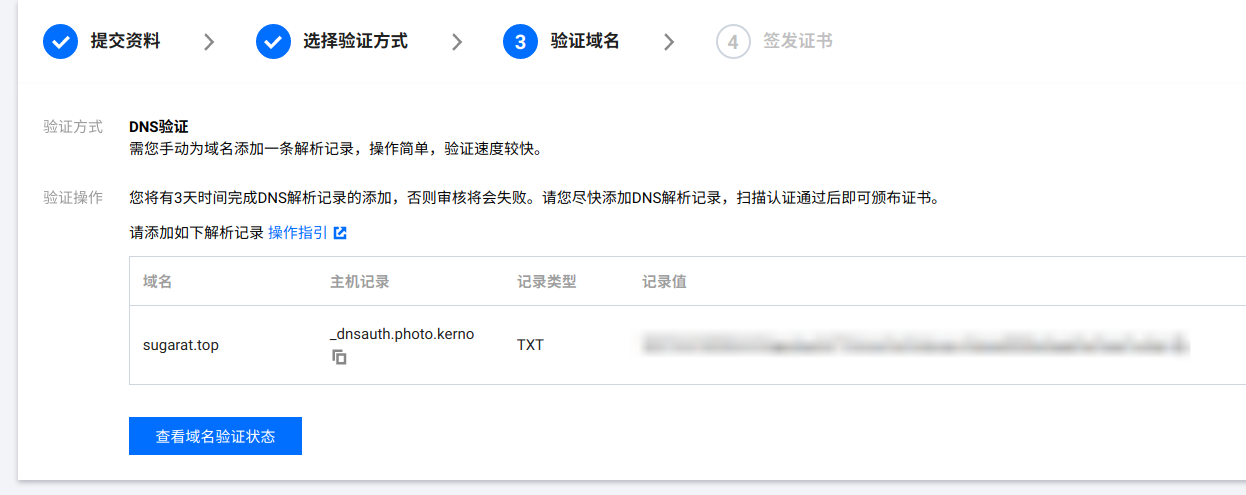
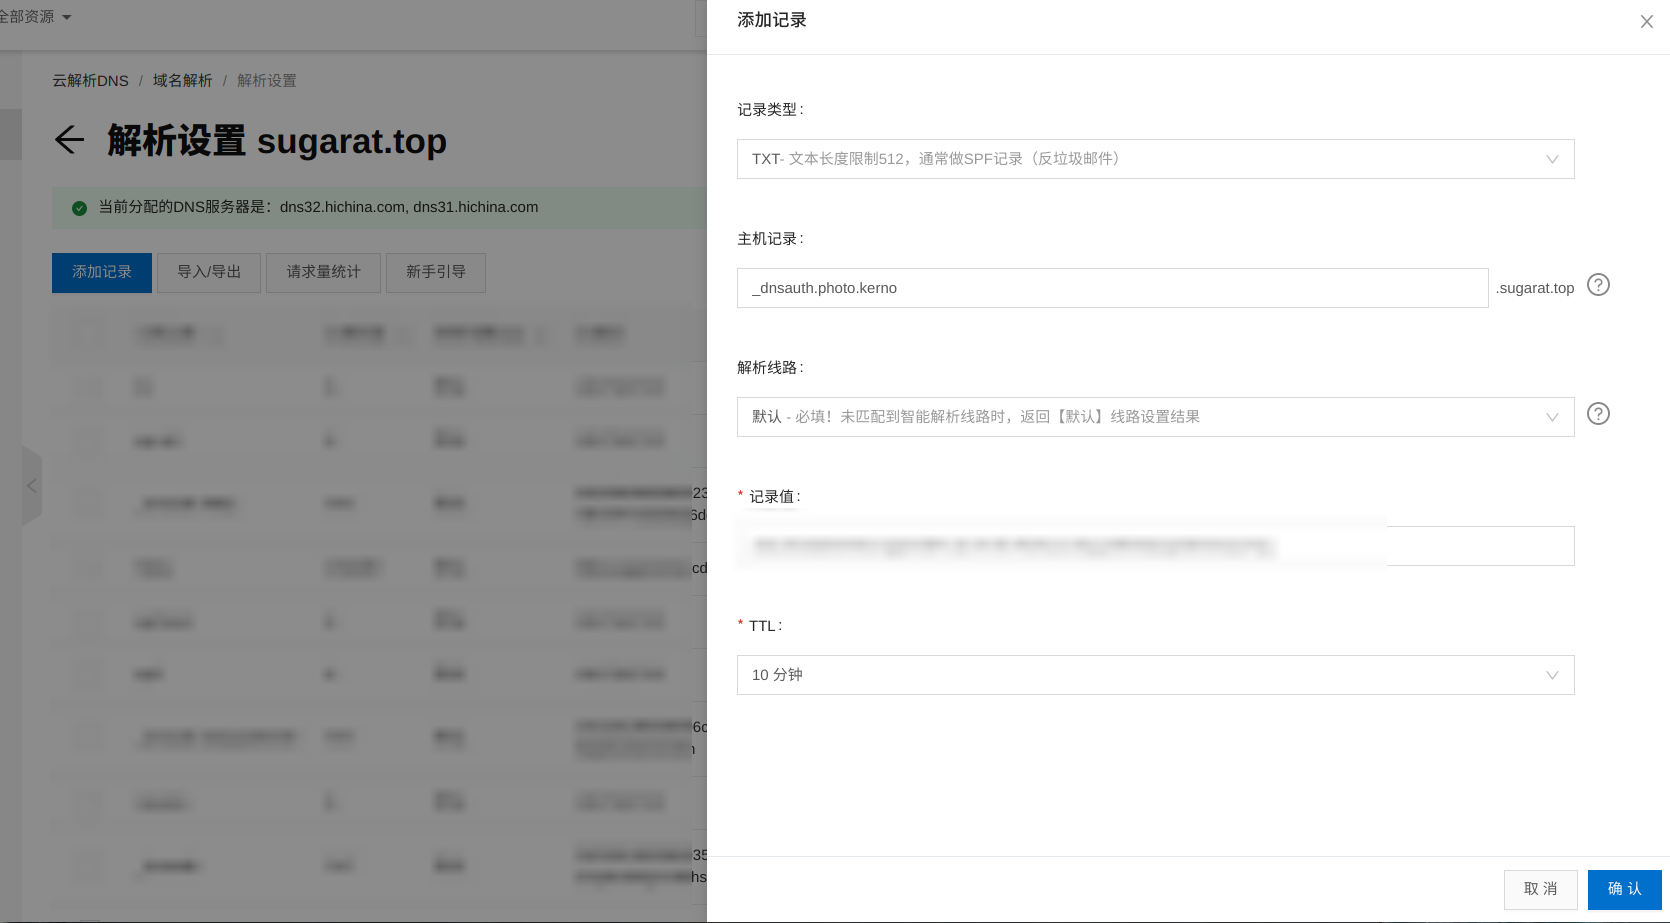
我这里域名是在阿里云上购买的

按要求添加解析
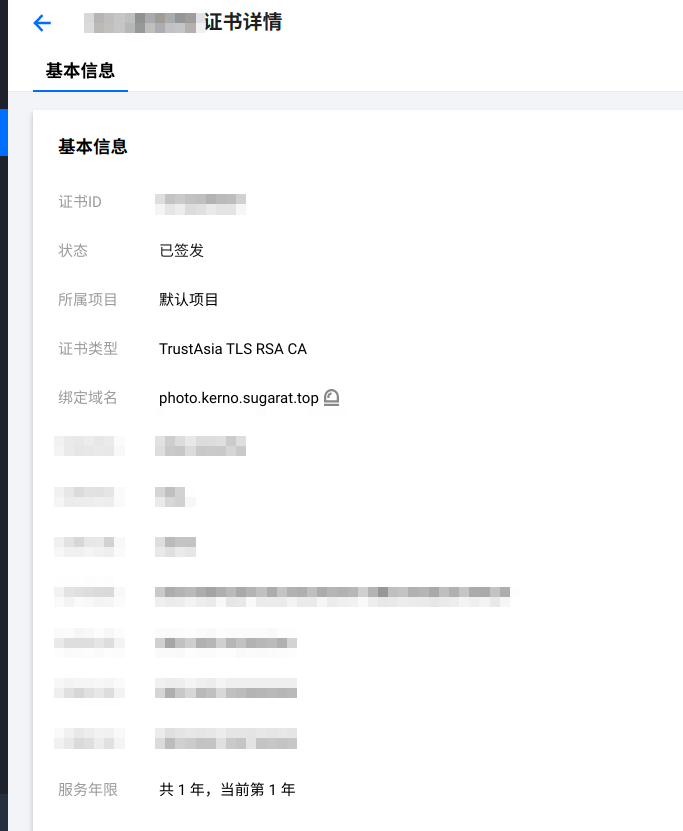
添加完成后,点击查询域名验证状态即可,申请完成后如下图所示
### 绑定域名
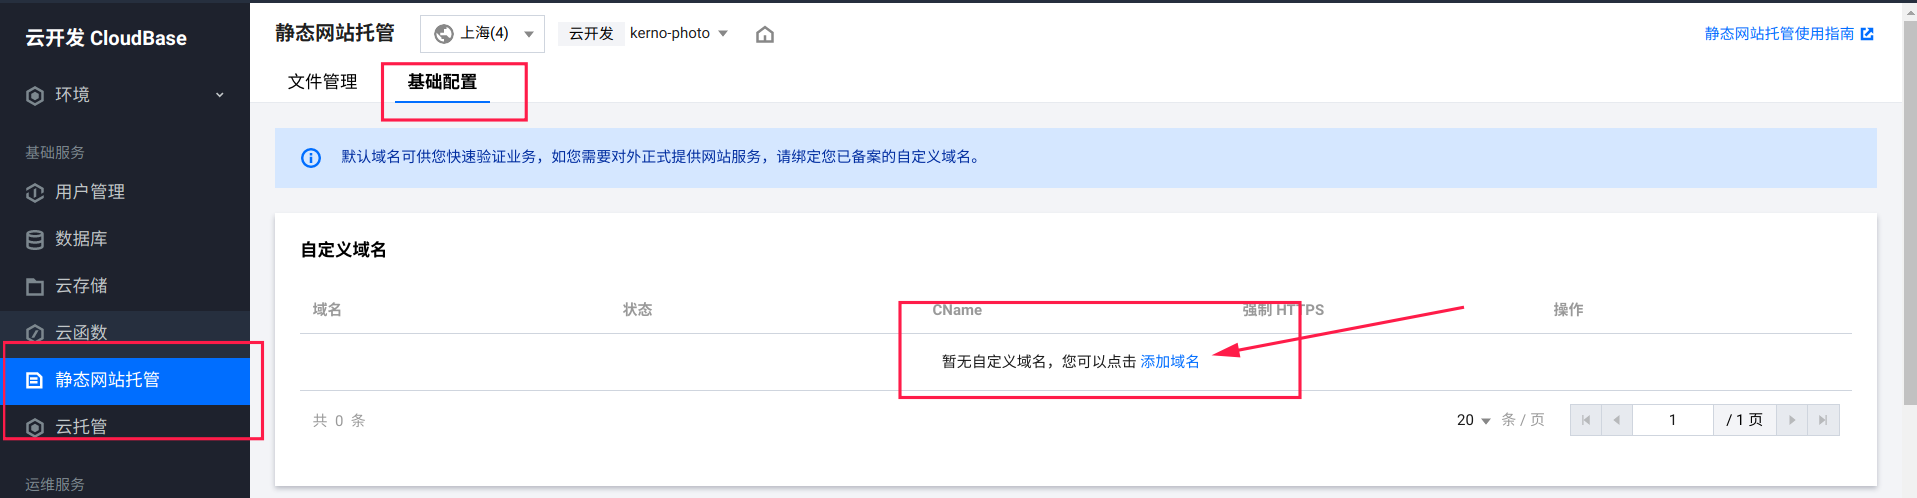
在静态网站托管tab 基础配置中添加自定义域名
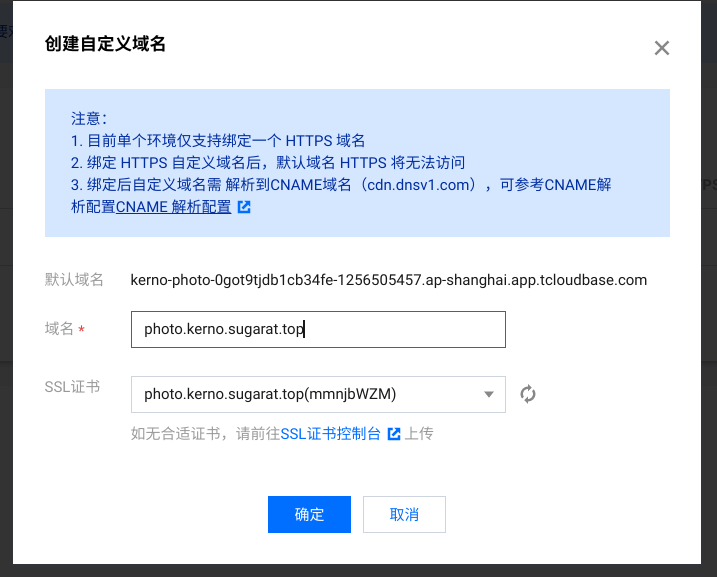
弹窗中输入刚刚申请证书用的域名
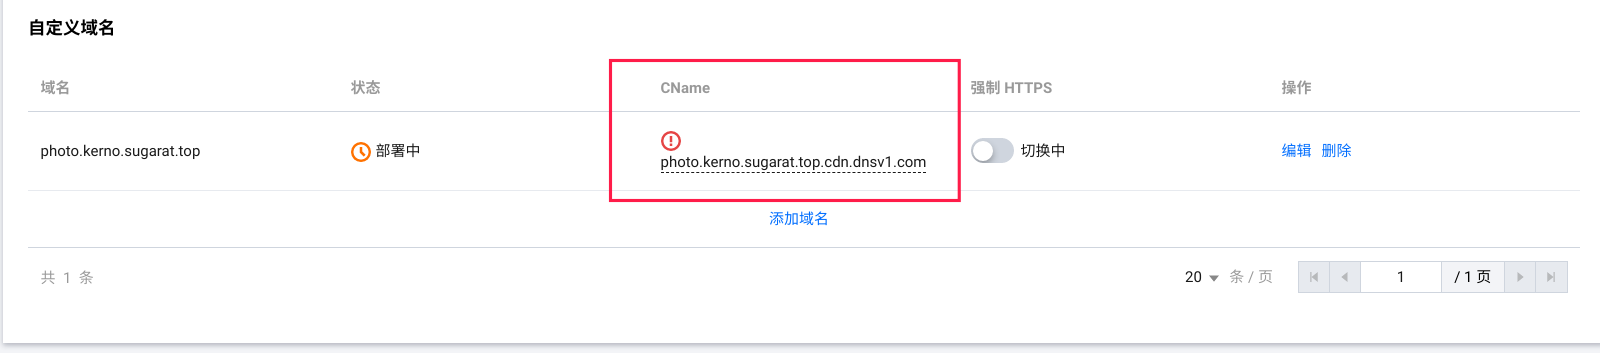
根据要求添加CName
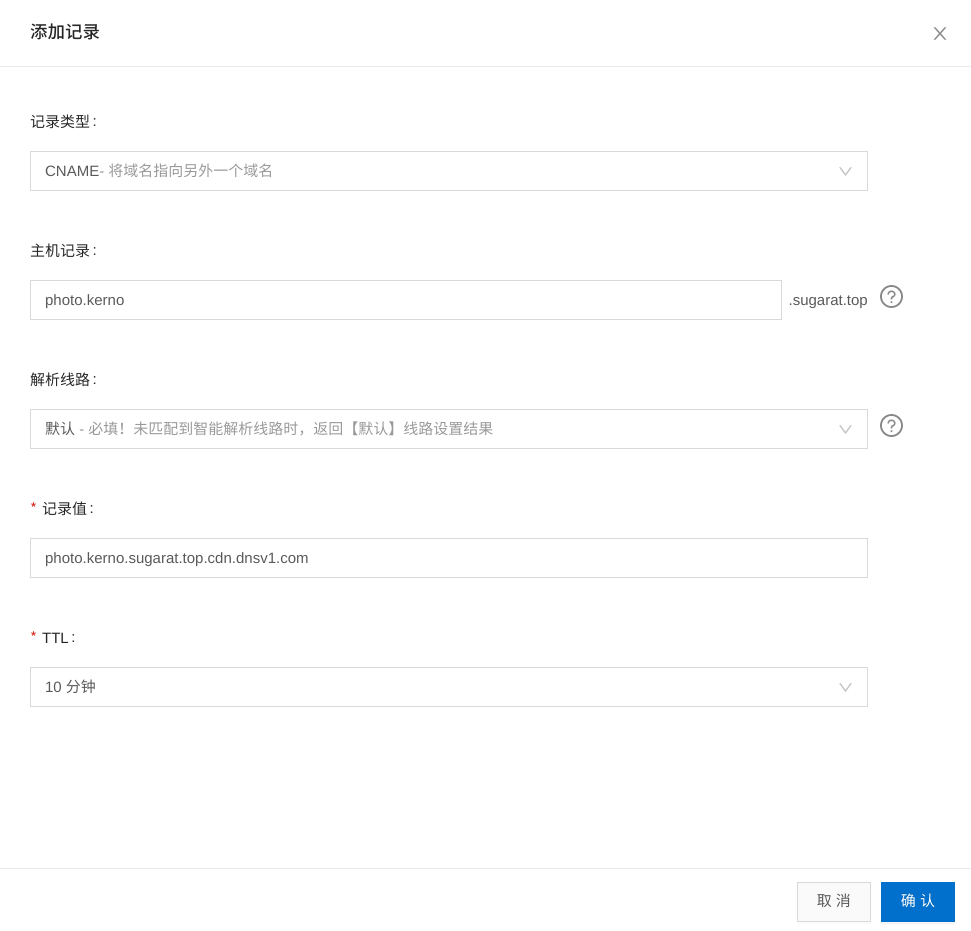
上述添加解析步骤一样
到此为止自定义域名就搞定了
咱访问一下试试:[photo.kerno.sugarat.top](https://photo.kerno.sugarat.top/)
## SPA单页应用的额外配置
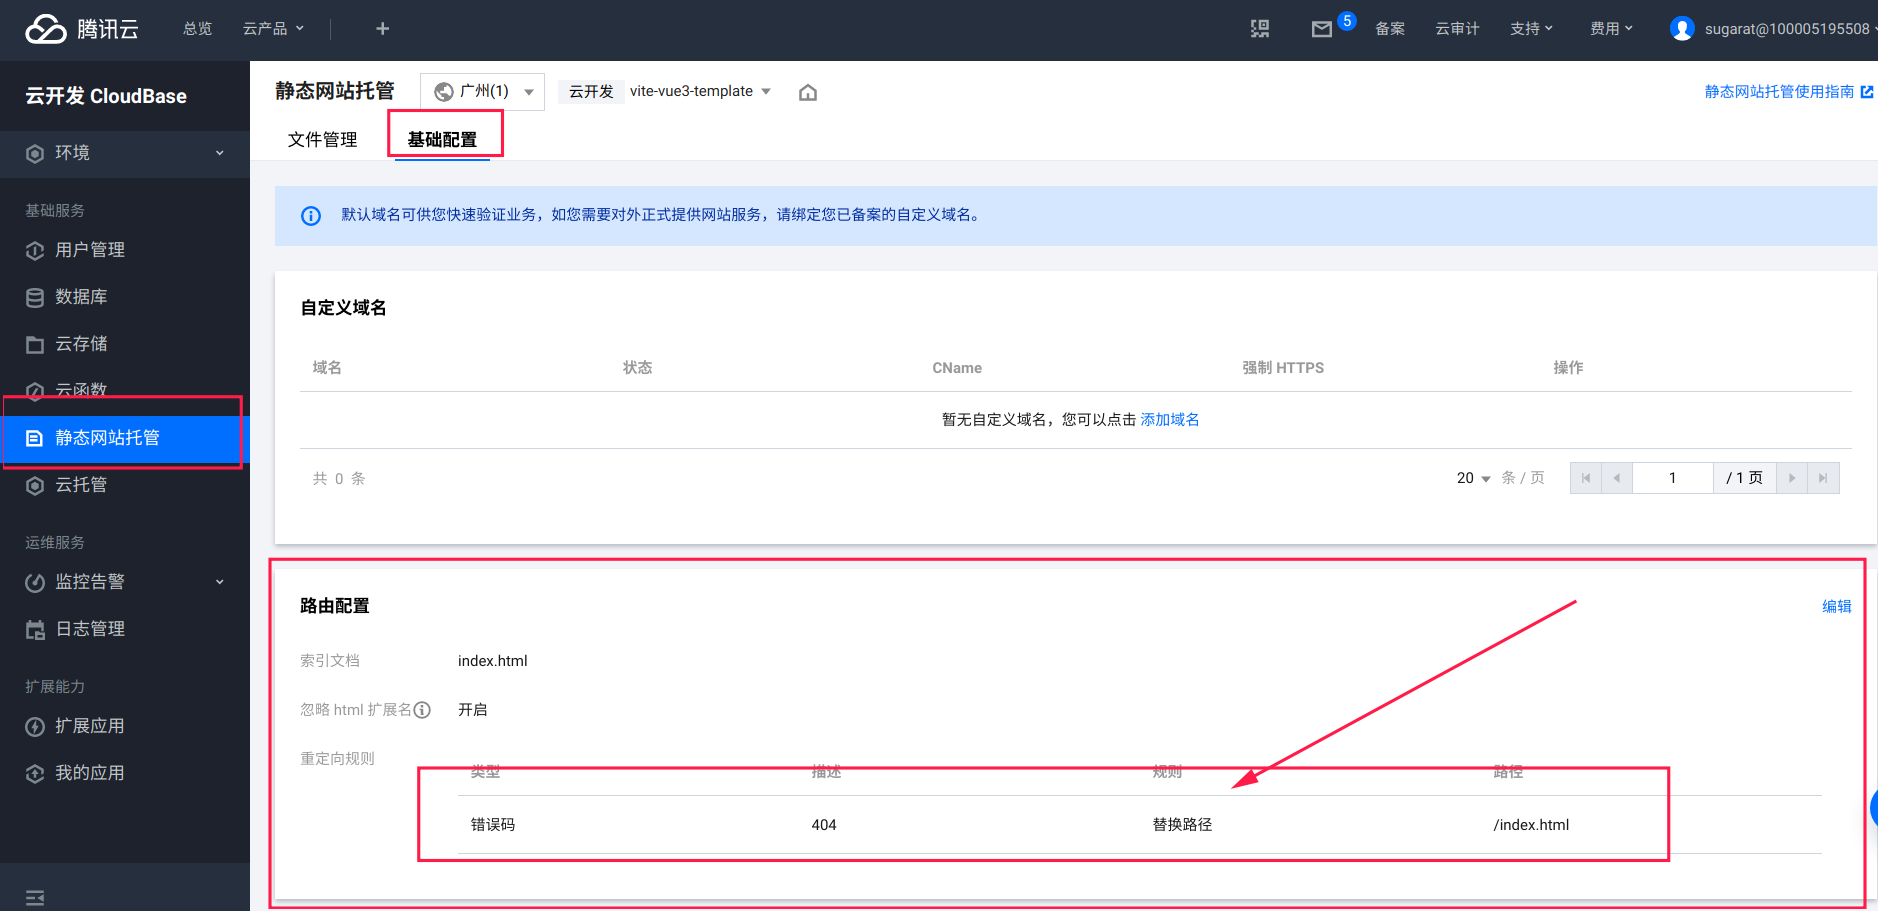
需要添加一条404的重定向配置,配置地方如下
## 接入Github Action持续集成
### 创建main.yml
根目录下创建`.github/workflows/main.yml`文件
```sh
.github
└── workflows
└── main.yml
```
main.yml文件内容如下
```yaml
# This is a basic workflow to help you get started with Actions
name: prod-CI
# Controls when the action will run.
on:
# Triggers the workflow on push or pull request events but only for the master branch
push:
branches: [ main ] # push到main分支上时触发
pull_request:
types: [ assigned ]
branches: [ main ] # 合并pr到main分支上时触发
# Allows you to run this workflow manually from the Actions tab
workflow_dispatch:
# A workflow run is made up of one or more jobs that can run sequentially or in parallel
jobs:
# This workflow contains a single job called "build"
build:
# The type of runner that the job will run on
runs-on: ubuntu-latest
# Steps represent a sequence of tasks that will be executed as part of the job
steps:
# Checks-out your repository under $GITHUB_WORKSPACE, so your job can access it
- uses: actions/checkout@v2
# 配置rsa密钥自动登陆
- name: Deploy to Tencent CloudBase
uses: TencentCloudBase/cloudbase-action@v2
with:
secretId: ${{secrets.SECRET_ID}}
secretKey: ${{secrets.SECRET_KEY}}
envId: ${{secrets.ENV_ID}}
```
### 仓库中配置Secrets
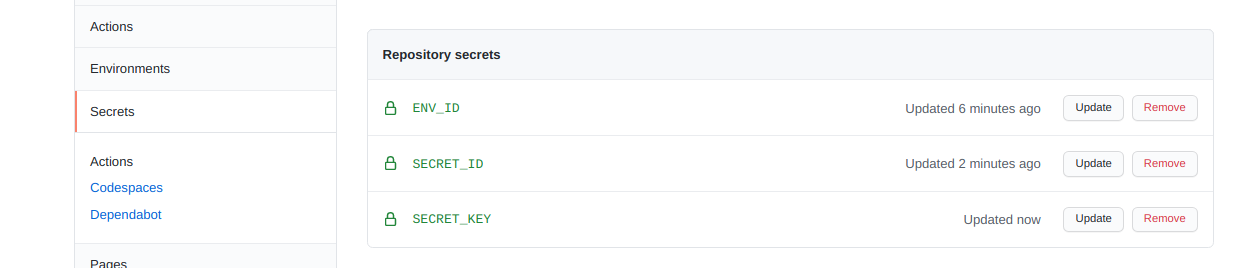
在仓库的Settings->Secrets 面板中新建secret
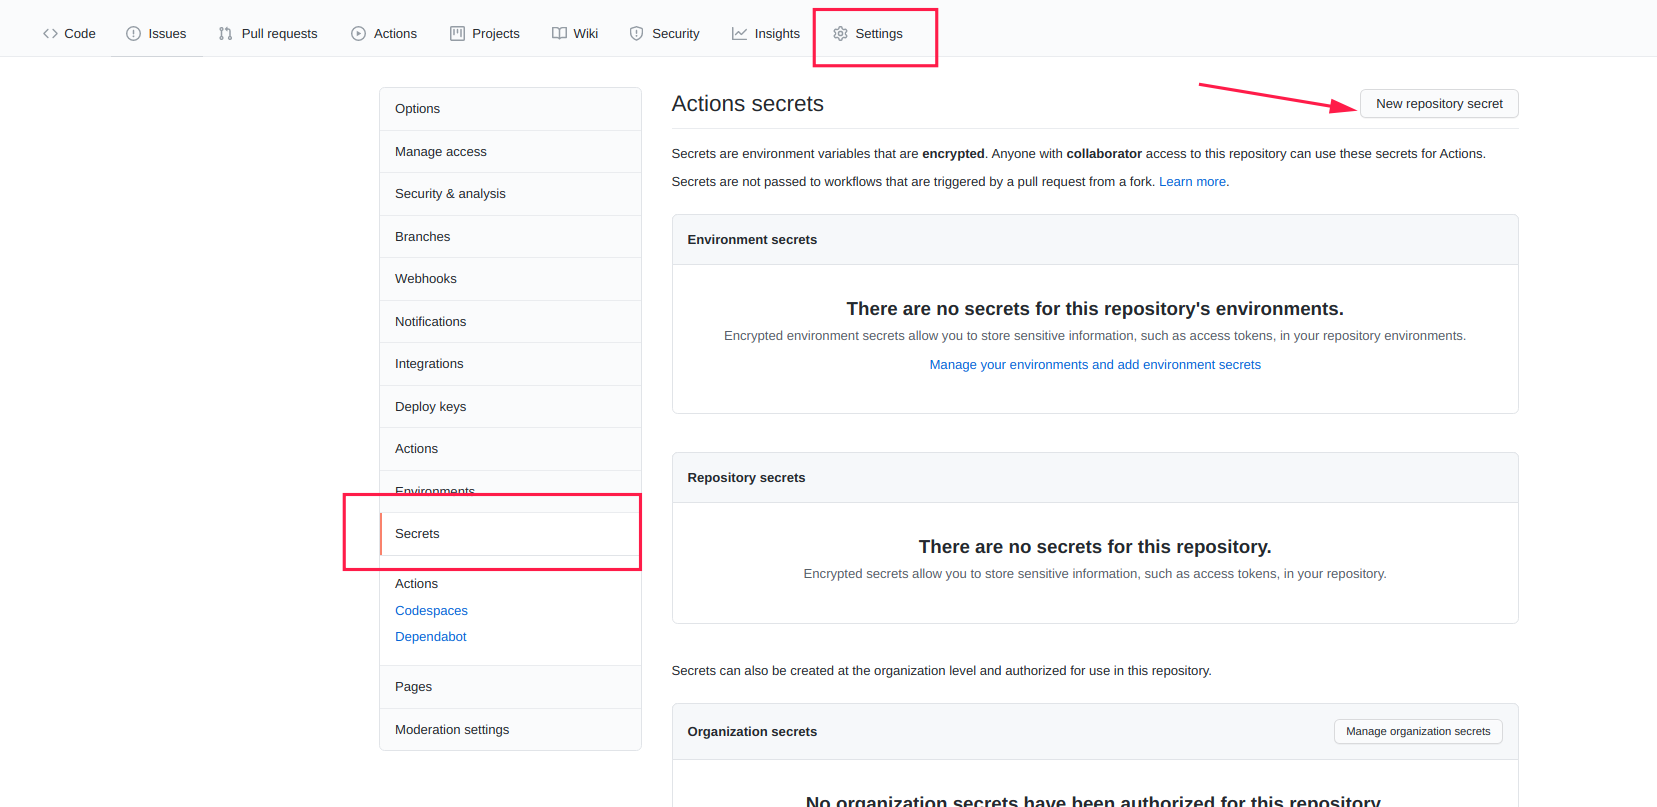
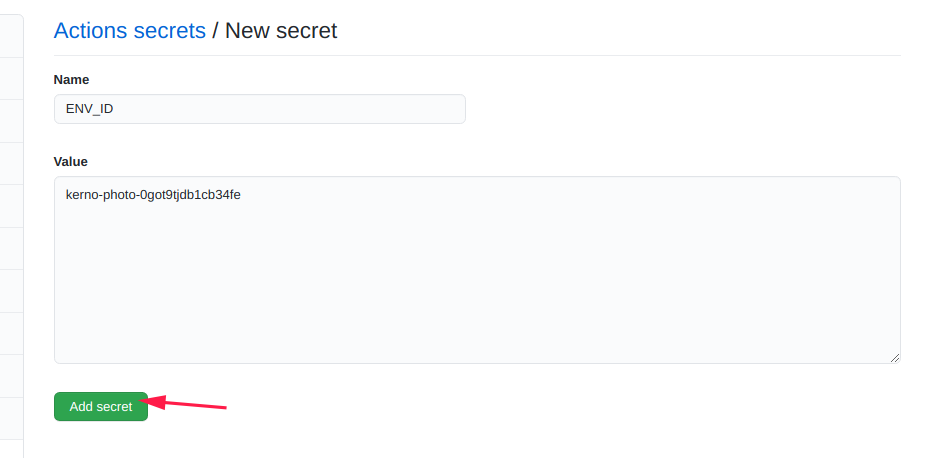
添加如下三个:
* SECRET\_ID:[获取地址](https://console.cloud.tencent.com/cam/capi)或参看下图
* SECRET\_KEY:[获取地址](https://console.cloud.tencent.com/cam/capi)或参看下图
* ENV\_ID:应用的envid
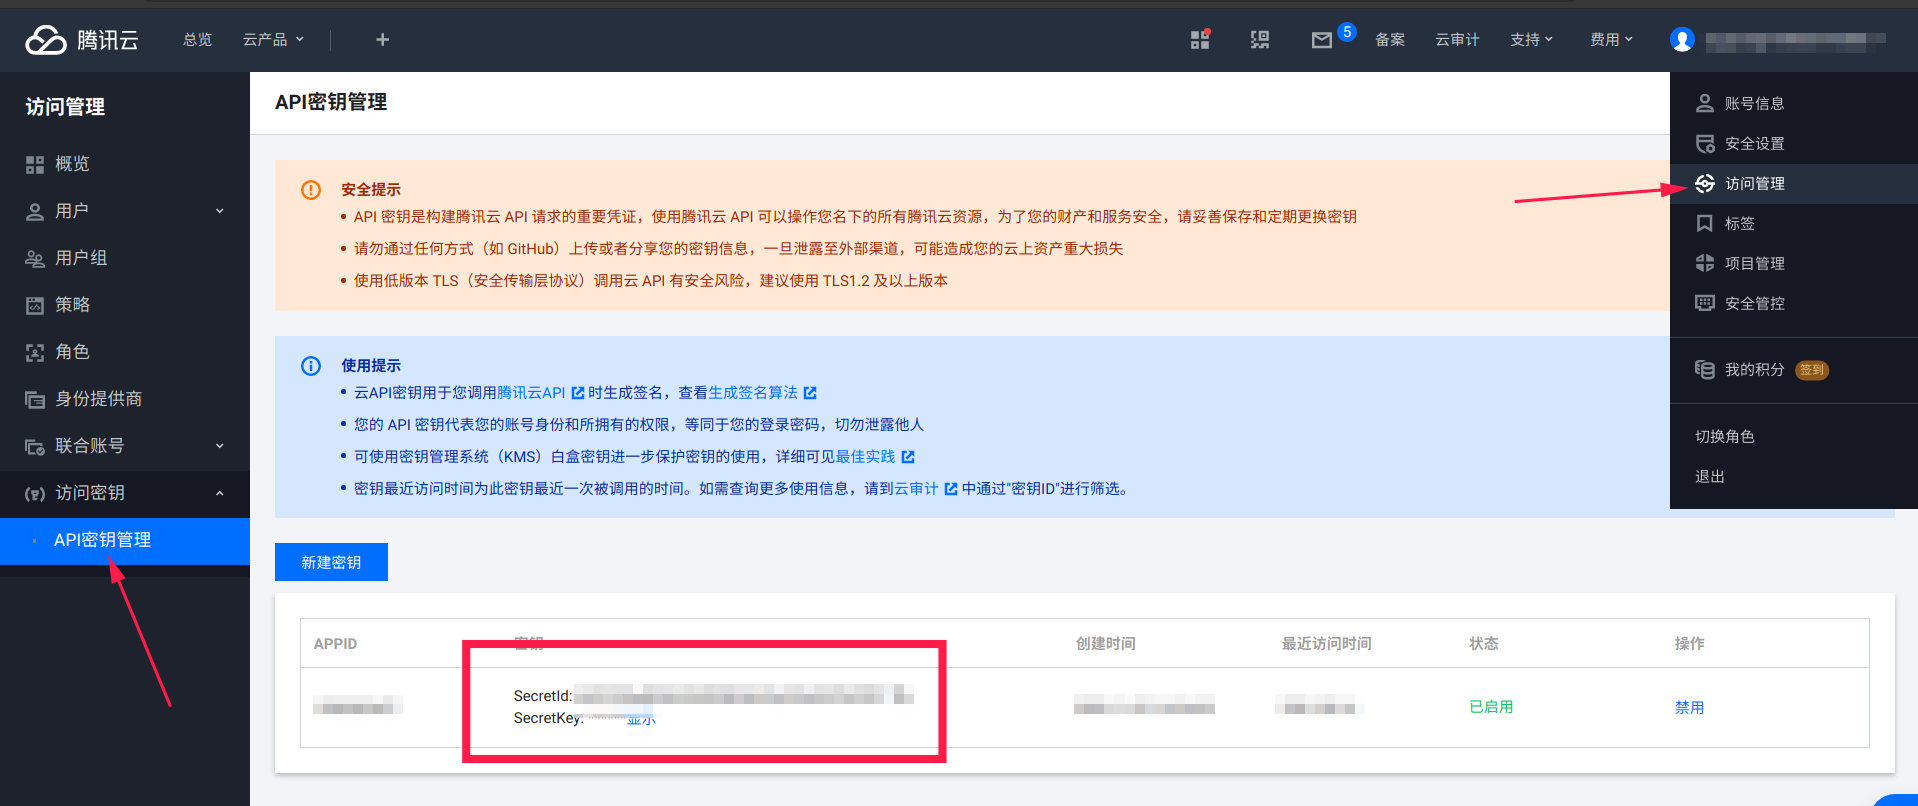
添加完成后如下图所示
### 推送配置文件
接下来只需要将main.yml文件推送到Github上即可
```sh
git add .github
git commit -m "chore: 添加main.yml文件"
git push
```
### 查看Action进度
此时打开仓库就能看见commit 信息旁边有个点
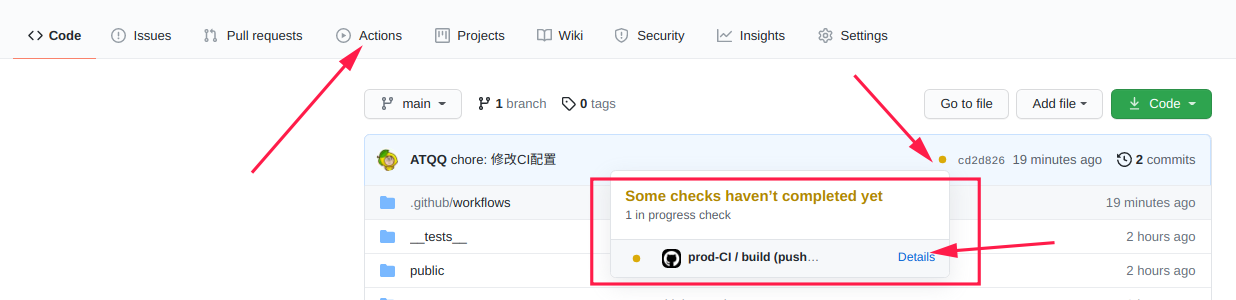
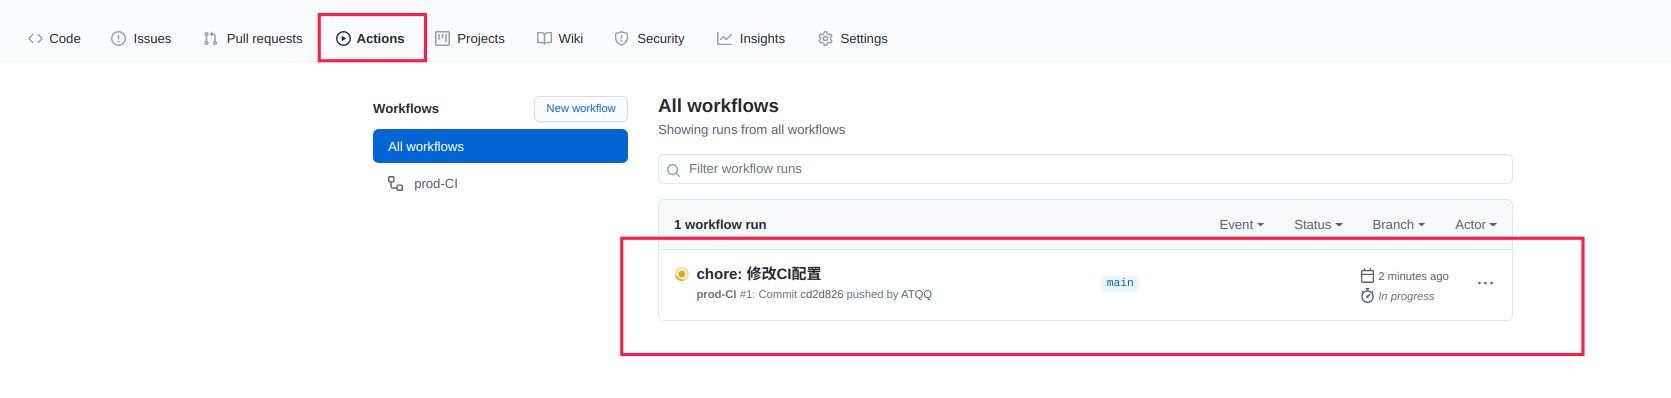
在Action面板中也能看见任务的执行状态,点击可查看详细进度
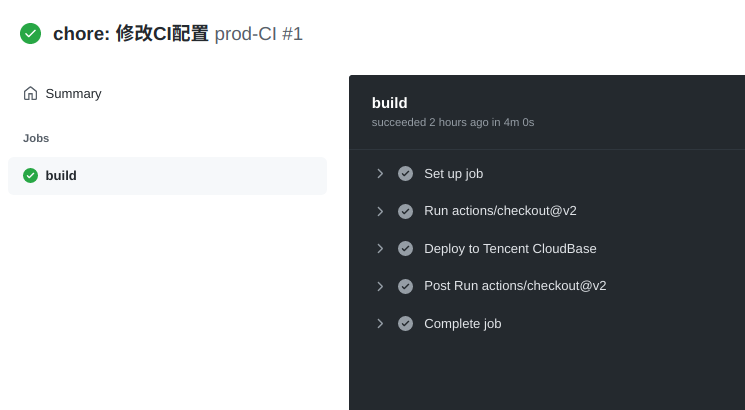
执行完成后如下图所示
## 参考资料
* [文档:云开发 CloudBase](https://cloud.tencent.com/document/product/876)