---
url: https://sugarat.top/works/time-lover/timeLover-2.md
---
# 实践:给女朋友个性化定制应用-体重记录(二)
**此系列的目的是帮助前端新人,熟悉现代前端工程化开发方式与相关技术的使用,普及一些通识内容**
## 前景回顾
[上一篇文章](./timeLover-1.md),主要阐述了应用前端工程的搭建与部分页面开发
本文简单介绍一下一期剩余的页面(**体重记录页**)开发,**着重阐述后端**部分的必要设计
## 本文涉及内容
* 体重记录页的开发
* 初始化后端Node+TypeScript项目
* 数据库设计
* 接口设计
* 云数据库初始化
## 体重记录页开发
* [完整源码](https://github.com/ATQQ/timeLover/blob/main/src/pages/funcs/weight/index.vue)
页面整体上由`导航`,`最近一次的记录`,`对比描述`,`历史记录`,`添加数据弹窗`等5部分组成
### 导航
直接使用[vant-nav-bar](https://vant-contrib.gitee.io/vant/v3/#/zh-CN/nav-bar)
**左按钮**返回上一页,**右按钮(icon)** 唤起添加添加成员的[弹窗: van-dialog](https://vant-contrib.gitee.io/vant/v3/#/zh-CN/dialog)
```vue
```
**效果**

**引入Dialog组件注意:** 由于`Dialog`支持直接当作方法使用`Dialog(options)`,再当作组件注册时与其它组件不太一样:
`src/utils/vantUI.ts`
```ts
import { Button, Dialog } from 'vant'
const conponents = [Button]
export default function mountVantUI(app: App) {
conponents.forEach((c) => {
app.component(c.name, c)
})
// 特别对待
app.component(Dialog.Component.name, Dialog.Component)
}
```
### 最近一次的记录
展示一下时间与体重即可
```html
2021-06-15 12:00:00
48.12公斤
```
**效果**

### 对比描述
包含**最新的一次记录**与
* 上一次比较
* 与今天第一次比较
* 与本月第一次比较
展示间隔的时间,并反应上升/下降的体重
**页面结构**
```html
{{ t.text }}
{{ t.res }}
与上一次比较(5小时前)
5 公斤
```
**效果**
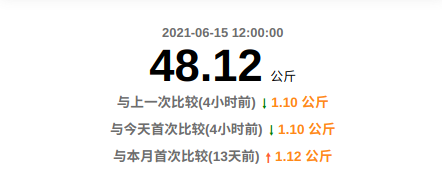
其中↑与↓的表示采用伪元素`::after`表示
```scss
.dec::after {
content: '🠐';
color: green;
transform: rotate(-90deg);
}
.inc::after {
content: '🠖';
color: #ff6034;
transform: rotate(-90deg);
}
```
[日期差值计算的工具方法](https://github.com/ATQQ/timeLover/blob/7d401d3d7734fc2bf8794c9ffc24db4b5c77dccf/src/pages/funcs/weight/index.ts#L18)
```ts
const ONE_SECONDS = 1000
const ONE_MINUTE = ONE_SECONDS * 60
const ONE_HOUR = ONE_MINUTE * 60
const ONE_DAY = ONE_HOUR * 24
function getTimeDiffDes(d1: Date, d2: Date) {
const diff = d1.getTime() - d2.getTime()
// 天
if (diff / ONE_DAY >= 1) {
return `${Math.round(diff / ONE_DAY)}天前`
}
// 小时
if (diff / ONE_HOUR >= 1) {
return `${Math.round(diff / ONE_HOUR)}小时前`
}
// 分钟
if (diff / ONE_MINUTE >= 1) {
return `${Math.round(diff / ONE_MINUTE)}分钟前`
}
// 秒
return `${Math.round(diff / ONE_SECONDS)}秒前`
}
```
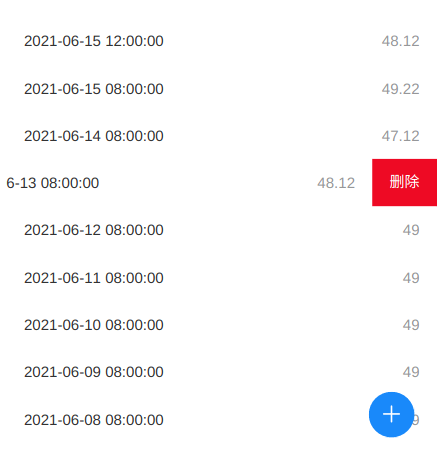
### 历史数据展示
直接套用Vant的 [van-swipe-cell](https://vant-contrib.gitee.io/vant/v3/#/zh-CN/swipe-cell)与 [van-cell](https://vant-contrib.gitee.io/vant/v3/#/zh-CN/cell)
```html
{{ t.weight }}
```
**效果**
### 页面最终效果
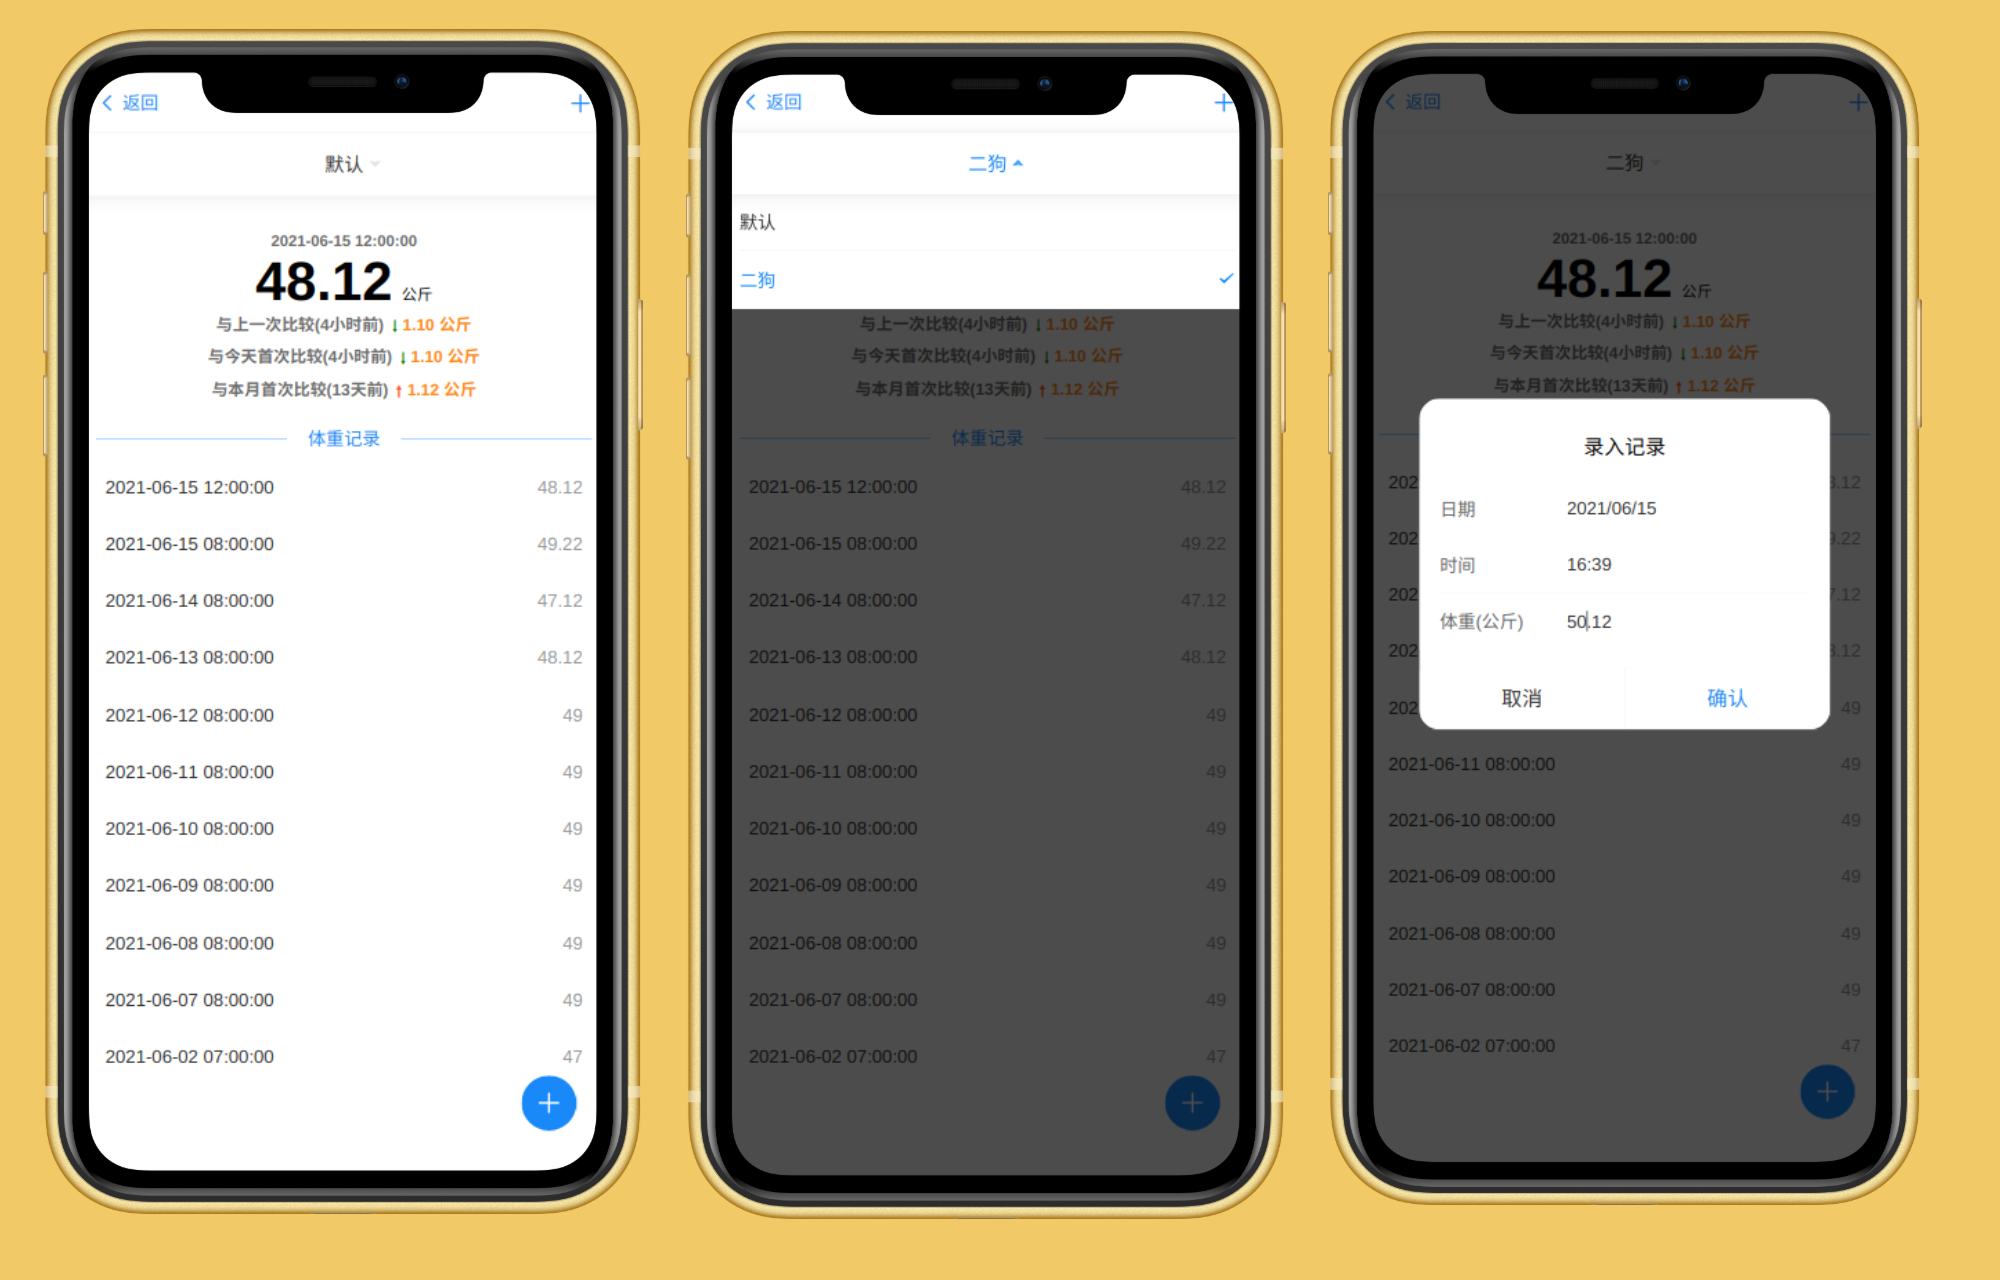
* [线上预览](https://lover.sugarat.top/funs/weight)
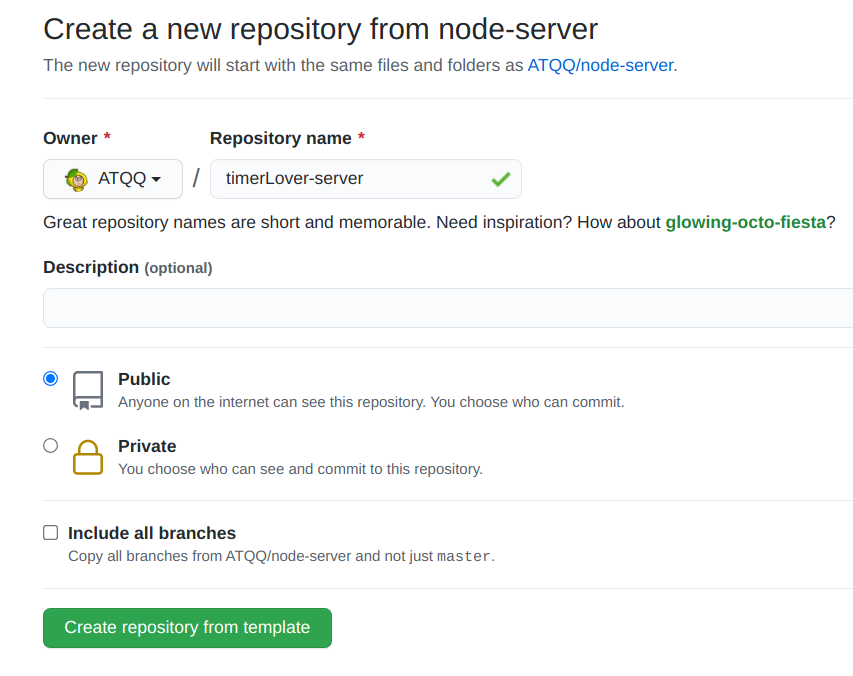
## 初始化后端工程
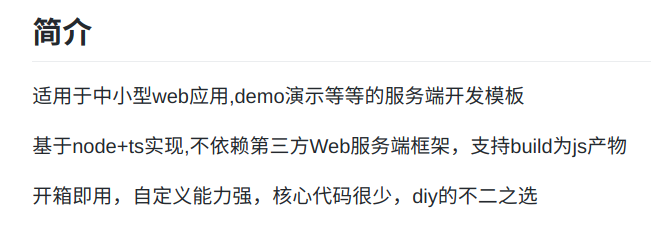
直接使用搭建的[ATQQ/node-server](https://github.com/atqq/node-server)模板[初始化项目](https://github.com/ATQQ/node-server/generate)
### 模板工程简介
## 数据库设计
使用: 腾讯云开发CloudBase提供的[云数据库](https://cloud.tencent.com/document/product/876/19369) (文档型数据库)
这样从头到尾都不需要买云服务器
### 相关需求简单回顾
* 短信验证码登录
* 支持同时记录多个人的数据
* 每个数据包含 `日期`与`体重`两部分内容
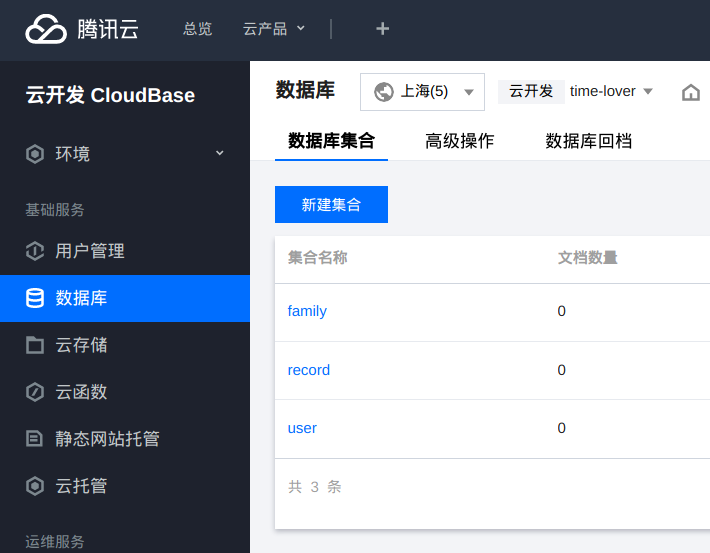
简单捋一下思路,使用三张表`用户表(user)`,`成员表(family)`,`记录表(record)`,具体设计如下
### 用户表-user
| 字段 | 类型 | 描述 |
| :------: | :----: | :------: |
| userId | String | 唯一标识 |
| phone | String | 手机号 |
| joinTime | Date | 注册时间 |
### 成员表-family
| 字段 | 类型 | 描述 |
| :------: | :----: | :----------: |
| familyId | String | 唯一标识 |
| userId | String | 关联创建用户 |
| name | String | 成员名称 |
### 记录表-record
| 字段 | 类型 | 描述 |
| :------: | :----: | :----------: |
| recordId | String | 唯一标识 |
| familyId | String | 关联成员 |
| userId | String | 关联创建用户 |
| weight | Number | 体重 |
| date | Date | 日期 |
## 初始化云数据库
> 服务端使用Node.js开发,使用云开发提供的Node SDK初始化集合(表)
**安装依赖**
```js
yarn add @cloudbase/node-sdk
```
### 初始化集合
```js
const cloudbase = require('@cloudbase/node-sdk')
const app = cloudbase.init({
secretId:process.env.secretId,
secretKey:process.env.secretKey,
env:process.env.envId
})
const db = app.database();
db.createCollection('user')
db.createCollection('family')
db.createCollection('record')
```
可以在CloudBase-数据库面板看到结果:
## 接口设计
按数据库对接口进行分类,这里只阐述请求方法与路径
使用**Eolinker**管理与测试接口:[此处查看完整接口设计](https://easy2.w.eolinker.com/share/index?shareCode=nJMZ5t)
### User
| 方法 | 路径 | 描述 |
| :---: | :---------: | :------------: |
| POST | /user/login | 用户登录 |
| GET | /user/code | 获取登录验证码 |
### Family
| 方法 | 路径 | 描述 |
| :---: | :---------: | :------: |
| POST | /family/add | 添加成员 |
### Record
| 方法 | 路径 | 描述 |
| :----: | :---------------: | :------: |
| POST | /record/:familyId | 添加记录 |
| DELETE | /record/:recordId | 删除记录 |
## 后端开发
### 数据库操作方法封装
根据文档[云开发 CloudBase > 开发指南 > 数据库 ](https://cloud.tencent.com/document/product/876/19369)编写
#### JS版本
```js
const cloudbase = require('@cloudbase/node-sdk')
const app = cloudbase.init({
secretId:process.env.secretId,
secretKey:process.env.secretKey,
env:process.env.envId
})
const db = app.database();
function insertDocument(collection, data) {
return db.collection(collection).add(data)
}
function deleteDocument(collection, query) {
return db.collection(collection).where(query).remove()
}
function findDocument(collection, query) {
return db.collection(collection).where(query).get()
}
function updateDocument(collection, query, data) {
return db.collection(collection).where(query).update(data)
}
```
#### TS版本
```ts
import cloudbase from '@cloudbase/node-sdk'
const app = cloudbase.init({
secretId: process.env.secretId,
secretKey: process.env.secretKey,
env: process.env.envId
})
export const db = app.database()
export function insertDocument(collection: string, data: T | T[]) {
return db.collection(collection).add(data)
}
export function deleteDocument(collection: string, query: any) {
return db.collection(collection).where(query).remove()
}
export function findDocument(collection: string, query: any) {
return db.collection(collection).where(query).get()
}
export function updateDocument(collection: string, query: any, data:T) {
return db.collection(collection).where(query).update(data)
}
```
### 未完待续
篇幅有限,下一章节再介绍后端部分的详细实现与前后端对接(/(ㄒoㄒ)/~~,主要还是没码完)
## 资料汇总
* [前端项目源代码](https://github.com/ATQQ/timeLover)
* [后端项目源代码](https://github.com/ATQQ/time-lover-server)
* [后端项目模板](https://github.com/ATQQ/node-server)
* [数据库设计](https://github.com/ATQQ/time-lover-server/blob/master/docs/db.md)
* [详细接口设计](https://easy2.w.eolinker.com/share/project/api/?groupID=-1\&shareCode=nJMZ5t\&shareToken=$2y$10$gNK48kATh9yIeQokemYpaefvSzmyUwCtpyZ6lEkHh7nQdoZ9PbGrm\&shareID=322197)
* [腾讯云数据库地址](https://cloud.tencent.com/document/product/876/19369)
* [项目线上预览地址](https://lover.sugarat.top/dashboard)